
A hot cocoa bar is the friendliest corner you can build in December: it asks nothing of guests, works at every hour, and makes a plain kitchen counter feel like a Christmas market stall. These hot cocoa bar ideas are all DIY in the truest sense — trays, jars, mugs and lights you mostly own already, arranged with a little intention. No special furniture, no matching set to buy, and no plumbing required. If you can clear one counter corner, you can build every version below.
Start with the bones, in this order: a base that contains the station, jars that show the ingredients, mugs within reach, and one warm light source. Everything else — stirrers, toppings, a slow cooker for a crowd — is a layer you add when you know how the bar will be used. A bar for two on quiet evenings needs less than a bar for a party of twelve, and building small first stops you buying toppings nobody touches. Most setups here cost under fifteen dollars in new supplies.
One practical rule keeps the bar working all month: keep water-based mess away from the pretty parts. Cocoa powder and crushed candy live in jars with lids, the kettle or slow cooker sits on a washable mat, and a small folded towel hides within reach for the inevitable drip. Pretty and practical are not opposites here — the jars and trays that make the bar look styled are the same ones that keep it tidy.
A note on placement before you choose your corner: pick the spot guests pass naturally — between the living room and the kitchen, not deep inside your cooking workspace. A cocoa bar placed where you chop onions will be dismantled by the second dinner; a bar on a sideboard, a cart or the far end of the counter survives the whole season untouched. Watch where mugs already gather in your home for one evening, and put the bar there. The best corner is the one people were already drifting toward.
1. Start With a Tray — the Base Every Cocoa Bar Needs

Every good cocoa bar starts with a boundary, and a tray is the simplest one. Set a wooden tray, a large cutting board or a charger plate on the counter and build only inside it: the cocoa canister, a small jar of marshmallows, two mugs and one evergreen sprig. The tray turns a few ordinary objects into a station, stops the arrangement from spreading across the whole counter, and lets you lift the entire bar away in one move when you need the workspace back. Wood reads warmest, white reads cleanest, and a tray with handles is worth hunting for at the thrift store. If your counter is tiny, a tray is not optional — it is the whole bar.
Budget: about $4–$8 total — a thrifted tray or board plus a sprig cut from a garland.
2. Put Every Topping in a Mason Jar

Mason jars are the working heart of a cocoa bar because they show the colors, seal tight, and cost almost nothing. Fill them in a row: cocoa powder, mini marshmallows, chocolate chips, crushed candy cane, and cinnamon sticks if you have them. Keep the jars similar in size, vary the fill heights a little, and the row will look styled without any effort. Lids matter — cocoa dust and marshmallow staleness are both defeated by a lid. Tie one ribbon around the marshmallow jar only, so the row has a single soft accent, and set the jars on or beside your tray base. Refill the marshmallows most; they disappear fastest, every single year. One more jar habit: fill jars only three-quarters full. A jar filled to the brim looks generous in a photo and spills in real life; three-quarters reads abundant and still lets the lid do its job.
Budget: about $5–$7 total — jars at about a dollar each; toppings shared with your baking cupboard.
3. Use a Tiered Stand to Go Vertical

When counter space is short, build up. A two-tiered stand holds mugs or topping cups on one level and jars, stirrers and napkins on the other, doubling your bar without touching more counter. Tuck evergreen sprigs between the items so the stand reads Christmas rather than cupcake shop, and keep the heaviest pieces — full jars, the cocoa canister — on the lower tier for stability. A stand also creates the height every flat counter arrangement lacks, and height is what makes a bar photograph like the ones you saved. Cake stands, plant stands and even a stack of sturdy books under a board can improvise the same effect for a weekend.
Budget: about $8–$12 total — a basic tiered stand, often cheaper thrifted.
4. Hang the Mugs Where Everyone Can See Them

Mugs hidden in a cupboard slow a cocoa bar down; mugs on display are both storage and decoration. Hang your best Christmas mugs from a wall rack, a row of hooks under a shelf, or a small mug tree on the counter. Mix red, white and one patterned set if you have them, and keep everyday plain mugs at the back for the crowd moments. Hanging mugs also solve the guest question — nobody has to ask where anything is, because the bar explains itself. Check hook strength once with your heaviest mug before the season starts, and leave one hook empty on purpose: a little breathing room looks better than a crowded row. If you have no wall space at all, a simple over-door rack or the side of a tall cupboard can carry the same row — the point is visibility, not the exact hardware.
Budget: about $4–$9 total — hooks or a small rack; mugs from your own cupboard.
5. Add One Small Sign — Blank, Painted or Printable

A cocoa bar benefits from one small sign the way a shop benefits from a name board: it tells everyone what this corner is for. A mini chalkboard on an easel, a painted wooden plaque, or a simple printable in a thrifted frame all work. Keep the wording short, set the sign at the back of the bar where jars will not hide it, and angle it slightly toward the room. If handwriting is not your strength, a printable costs almost nothing and looks cleaner than a rushed chalk attempt. One sign is enough — a bar covered in labels stops feeling homemade and starts feeling like a meeting room.
Budget: about $3–$6 total — a mini board or frame plus printing or paint you own.
6. Make a Stirrer Jar With Candy Canes and Spoons

Stirrers are the small detail guests remember. Fill one tall jar or glass with candy canes, cinnamon sticks and a few wooden spoons, and set it where hands reach it last — after the cocoa is poured. Candy canes melt slowly into the drink and flavor it as they go, cinnamon sticks suit anyone avoiding extra sugar, and spoons cover the whipped-cream crowd. The jar adds vertical color for almost no money, and it refills from the same candy box all season. Keep the jar narrow so the stirrers stand upright instead of sliding into a heap, and replace broken canes promptly — a tidy jar is the whole point.
Budget: about $3–$5 total — one box of candy canes plus sticks and spoons from the drawer.
7. Serve a Crowd From a Slow Cooker

For a party, the kettle becomes a bottleneck, and a slow cooker quietly removes it. Make one large batch of cocoa, hold it on the warm setting with a ladle beside it, and guests serve themselves while you stay out of the kitchen. Set the cooker on a mat at the back of the bar, run the cord safely behind, and put the topping jars in front so the line flows in one direction. Stir the pot each time you pass, because cocoa settles, and keep a small jug of milk nearby for anyone who likes theirs lighter. This is the version that turns a decorative bar into real hospitality.
Budget: about $6–$10 in ingredients for a full pot — the cooker itself comes from your cupboard.
8. Wrap the Corner in Fairy Lights and Greenery

Light is what turns a counter arrangement into an evening destination. Run one string of warm fairy lights along the back of the bar, behind the jars so they glow through the glass, and lay a short evergreen garland along the front edge. Battery lights avoid the outlet problem entirely and let you place the bar on a sideboard, a cart or a hallway console instead of only the kitchen. Keep lights and liquids sensible — lights behind and above, drinks in front and below — and the effect stays safe as well as pretty. At dusk, this corner will pull people in without a word.
Budget: about $5–$8 total — one battery light string plus a short garland.
9. Build a Low Topping Station Kids Can Reach
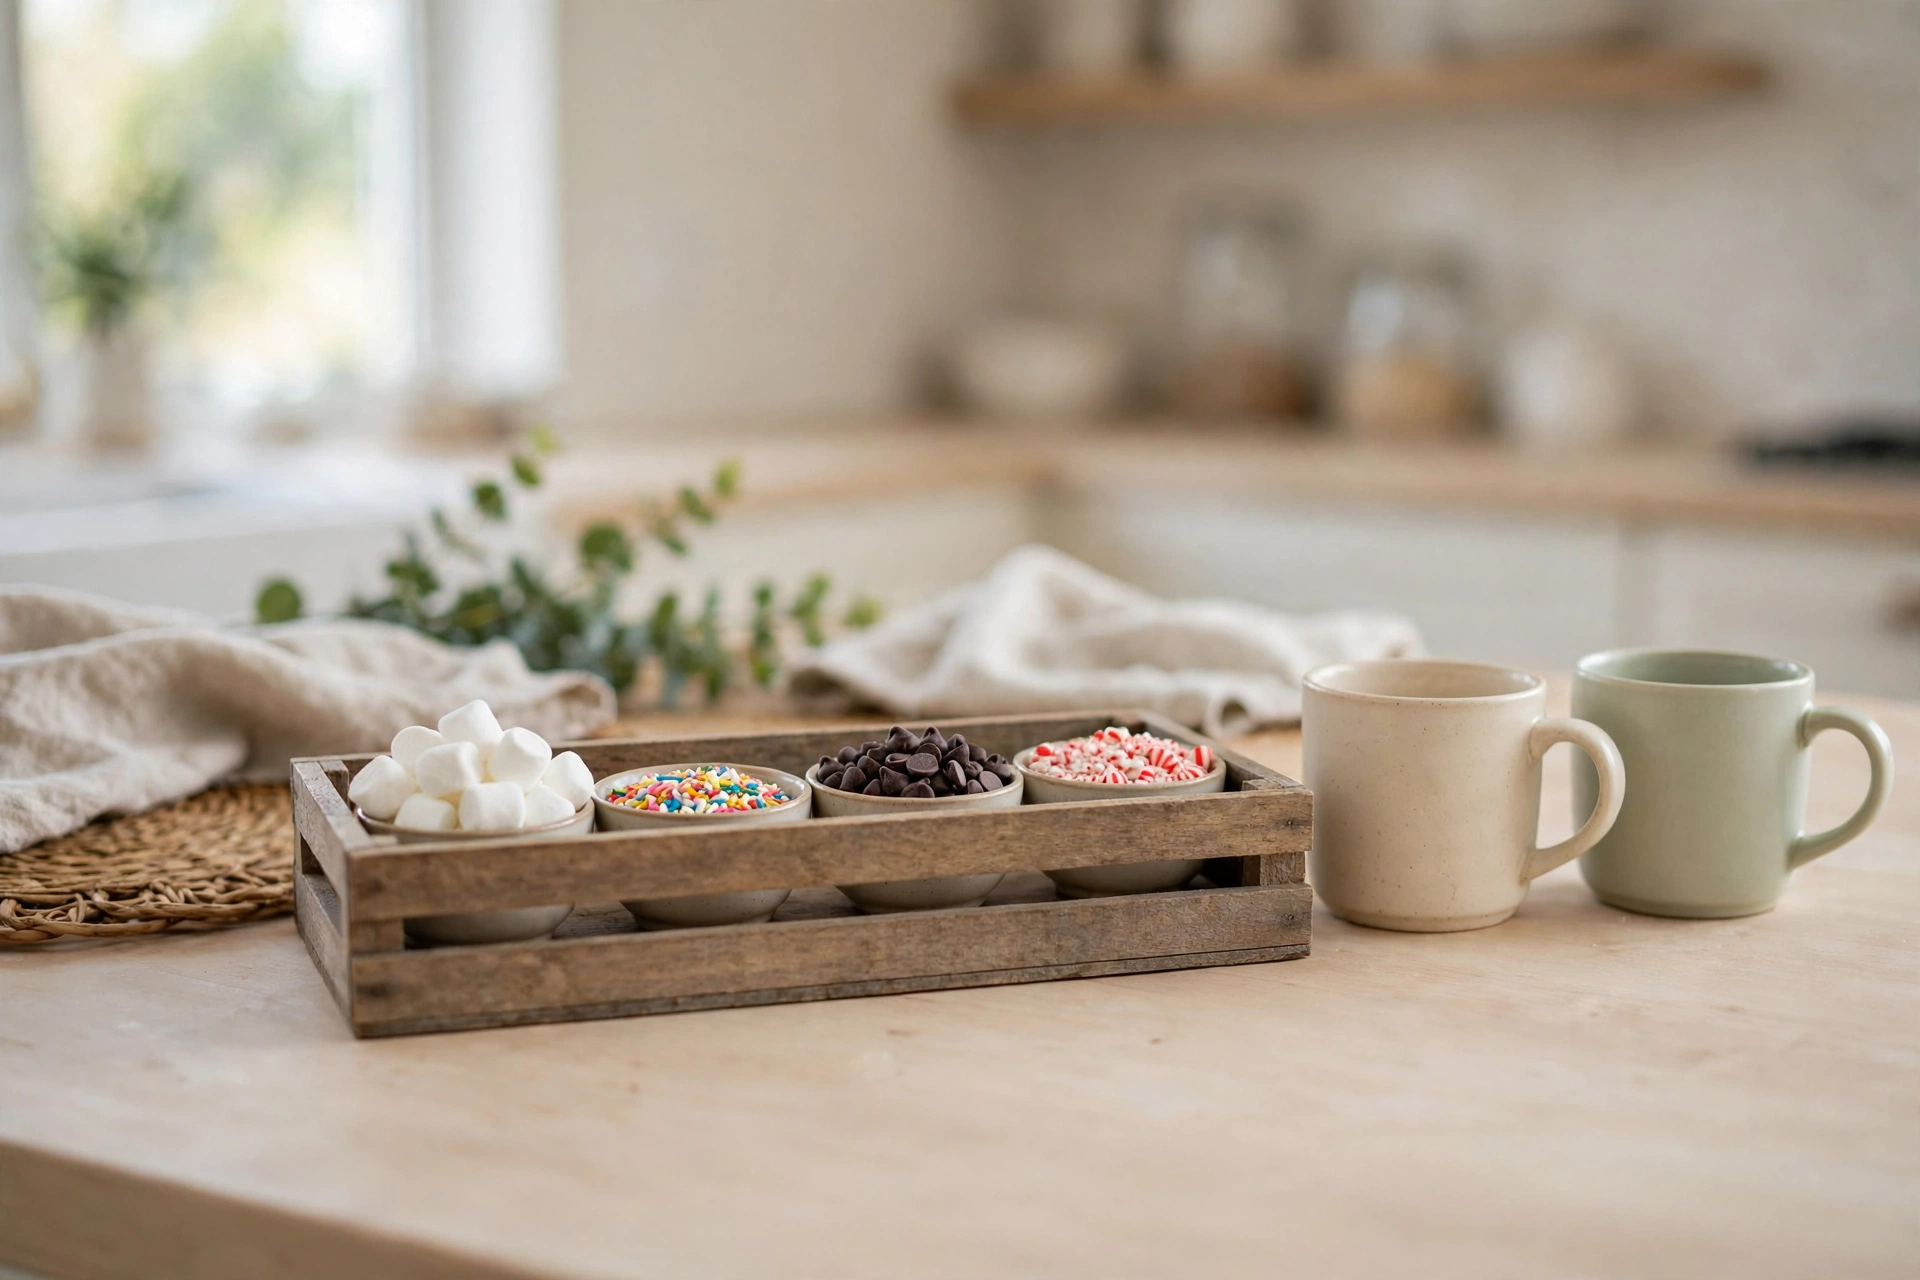
If children will use the bar, give them their own low zone: a wooden crate or a low tray with small bowls of marshmallows, sprinkles, chocolate chips and crushed candy, set at their height on a chair-height side table or the lowest counter edge. Small bowls mean small spills, and a defined kid zone keeps small hands out of the glass jar row. Let them build their own drinks and the bar becomes an activity, not just a drink station — which, at a family gathering, is worth more than the cocoa. Keep one adult mug hook and the hot liquid firmly in the grown-up zone, and everyone relaxes.
Budget: about $5–$8 total — a crate plus small bowls; toppings shared with the main bar.
10. Put It All Together — Hot Cocoa Bar Ideas for Any Corner

Now step back and read the corner as a guest will. The tray gives it borders, the jars give it color, the tiered stand gives it height, the hanging mugs explain it, and the lights make it glow after dark. A slow cooker joins on party days, a low crate joins when kids arrive, and everything else lives quietly in one contained corner the rest of the month. Nothing here needed a renovation, a new appliance or a matching retail set — just ordinary kitchen things, arranged once and then simply kept tidy. That is the whole secret of a bar that lasts the season instead of collapsing after one weekend.
Budget: about $35–$55 to build the full corner from scratch — far less if your jars, mugs and tray already live in your kitchen.
Build the bones first — tray, jars, mugs, light — and add only the layers your household will actually use. The best hot cocoa bar ideas are never the biggest ones; they are the ones still tidy, stocked and glowing on the twenty-third of December. Set yours up this weekend, and let the corner do the hosting for the rest of the season.
Total Cost Recap
| Idea | What You Need | Estimated Cost |
|---|---|---|
| Start With a Tray | A thrifted tray or board plus a sprig cut from a garland | $4–$8 |
| Put Every Topping in a Mason Jar | Jars at about a dollar each; toppings shared with your baking cupboard | $5–$7 |
| Use a Tiered Stand to Go Vertical | A basic tiered stand, often cheaper thrifted | $8–$12 |
| Hang the Mugs Where Everyone Can See Them | Hooks or a small rack; mugs from your own cupboard | $4–$9 |
| Add One Small Sign | A mini board or frame plus printing or paint you own | $3–$6 |
| Make a Stirrer Jar With Candy Canes and Spoons | One box of candy canes plus sticks and spoons from the drawer | $3–$5 |
| Serve a Crowd From a Slow Cooker | Ingredients for a full pot (slow cooker from your cupboard) | $6–$10 |
| Wrap the Corner in Fairy Lights and Greenery | One battery light string plus a short garland | $5–$8 |
| Build a Low Topping Station Kids Can Reach | A crate plus small bowls; toppings shared with the main bar | $5–$8 |
| Total | $43–$73 |
Frequently Asked Questions
Q: How much does a full hot cocoa bar cost to set up?
A: The article’s put-together budget is about $35–$55 from scratch — and far less if your jars, mugs and tray already live in your kitchen, since the toppings are shared with your baking cupboard.
Q: How much counter space does a cocoa bar need?
A: Just one corner. A tray or a tiered stand keeps everything in a single small footprint, and hanging the mugs on hooks frees the counter itself.
Q: Can a cocoa bar work for a party crowd?
A: Yes — one idea serves a crowd from a slow cooker, at about $6–$10 in ingredients for a full pot, and there is a low topping station that kids can reach on their own.
Pingback: Christmas Kitchen Decor Budget Ideas: 11 Cozy Ways to Dress Up the Heart of Your Home