

A Christmas village is the decoration people stop in front of — kids crouch down to peer in the windows, guests ask where each little house came from, and the whole display glows long after the tree lights feel ordinary. These christmas village display ideas prove you do not need a collector’s budget or a spare dining table to build one: a bookshelf, a mantel or a single sideboard is enough, and most of the magic comes from height, light and fake snow rather than expensive houses.
Start with whatever houses you can gather. One or two new pieces, a few thrifted finds, even cardboard houses you make yourself — a village reads as a village once the houses share a color family, sit at different heights and glow with the same warm light. Buy slowly and second-hand first: miniature houses appear in thrift stores and yard sales all year for a dollar or two, and a coat of paint unifies any mismatched set. Most displays below cost under twenty-five dollars in new supplies, and several cost almost nothing at all.
Two rules carry every good display. First, build in layers: a back row raised high, a middle row, and a front row low, so every roof stays visible. Second, hide the mechanics — cords tucked behind, risers covered with felt or snow, battery packs slipped under a house. When the tricks disappear, only the little lit world remains, and that is exactly the effect you want.
Choose your spot before you unpack a single house: one flat surface, between waist and eye height so the details read, with enough depth for at least two rows. Bookshelves, mantels, console tables, sideboards and wide windowsills all qualify.
1. Start on a Bookshelf — a Tiered Village on Shelves

A bookshelf is the easiest village home there is, because the tiers are already built. Clear two or three shelves, lay white felt or a strip of batting along each one, and give every shelf its own little scene: houses and a church on the top shelf, shops in the middle, tiny trees and figures at the front edge of the lowest shelf. The shelf sides frame the village like a picture, cords hide behind the books you push to the back, and the whole display takes zero extra floor or table space. If the shelves are deep, raise the back houses on paperback books hidden under the felt. This is also the safest spot in a house with toddlers or cats — the village lives behind no barrier, yet stays out of grabbing range on the higher shelves.
Budget: about $3–$6 total — white felt or batting plus houses you gather slowly.
2. Turn the Mantel Into Main Street

A mantel is a ready-made main street: long, narrow and right at eye level. Line the houses in a gentle row along the back edge, tallest in the middle, with a church or clock tower as the centerpiece. Weave a thin garland in front of the houses as a hedge, tuck bottle brush trees between the buildings, and let one string of warm fairy lights run behind the row so every window seems lit. Keep the front edge of the mantel clear or nearly clear — the depth is shallow, and a village that crowds the edge will lose a house to the floor sooner or later. Secure lightweight houses with a dot of museum putty if your mantel vibrates with the front door. Seen from the sofa, a mantel village reads like a street at dusk, and it costs nothing but the houses themselves.
Budget: about $5–$9 total — a thin garland and fairy lights; houses from your collection.
3. Build Snowy Hills From White Felt and Foam
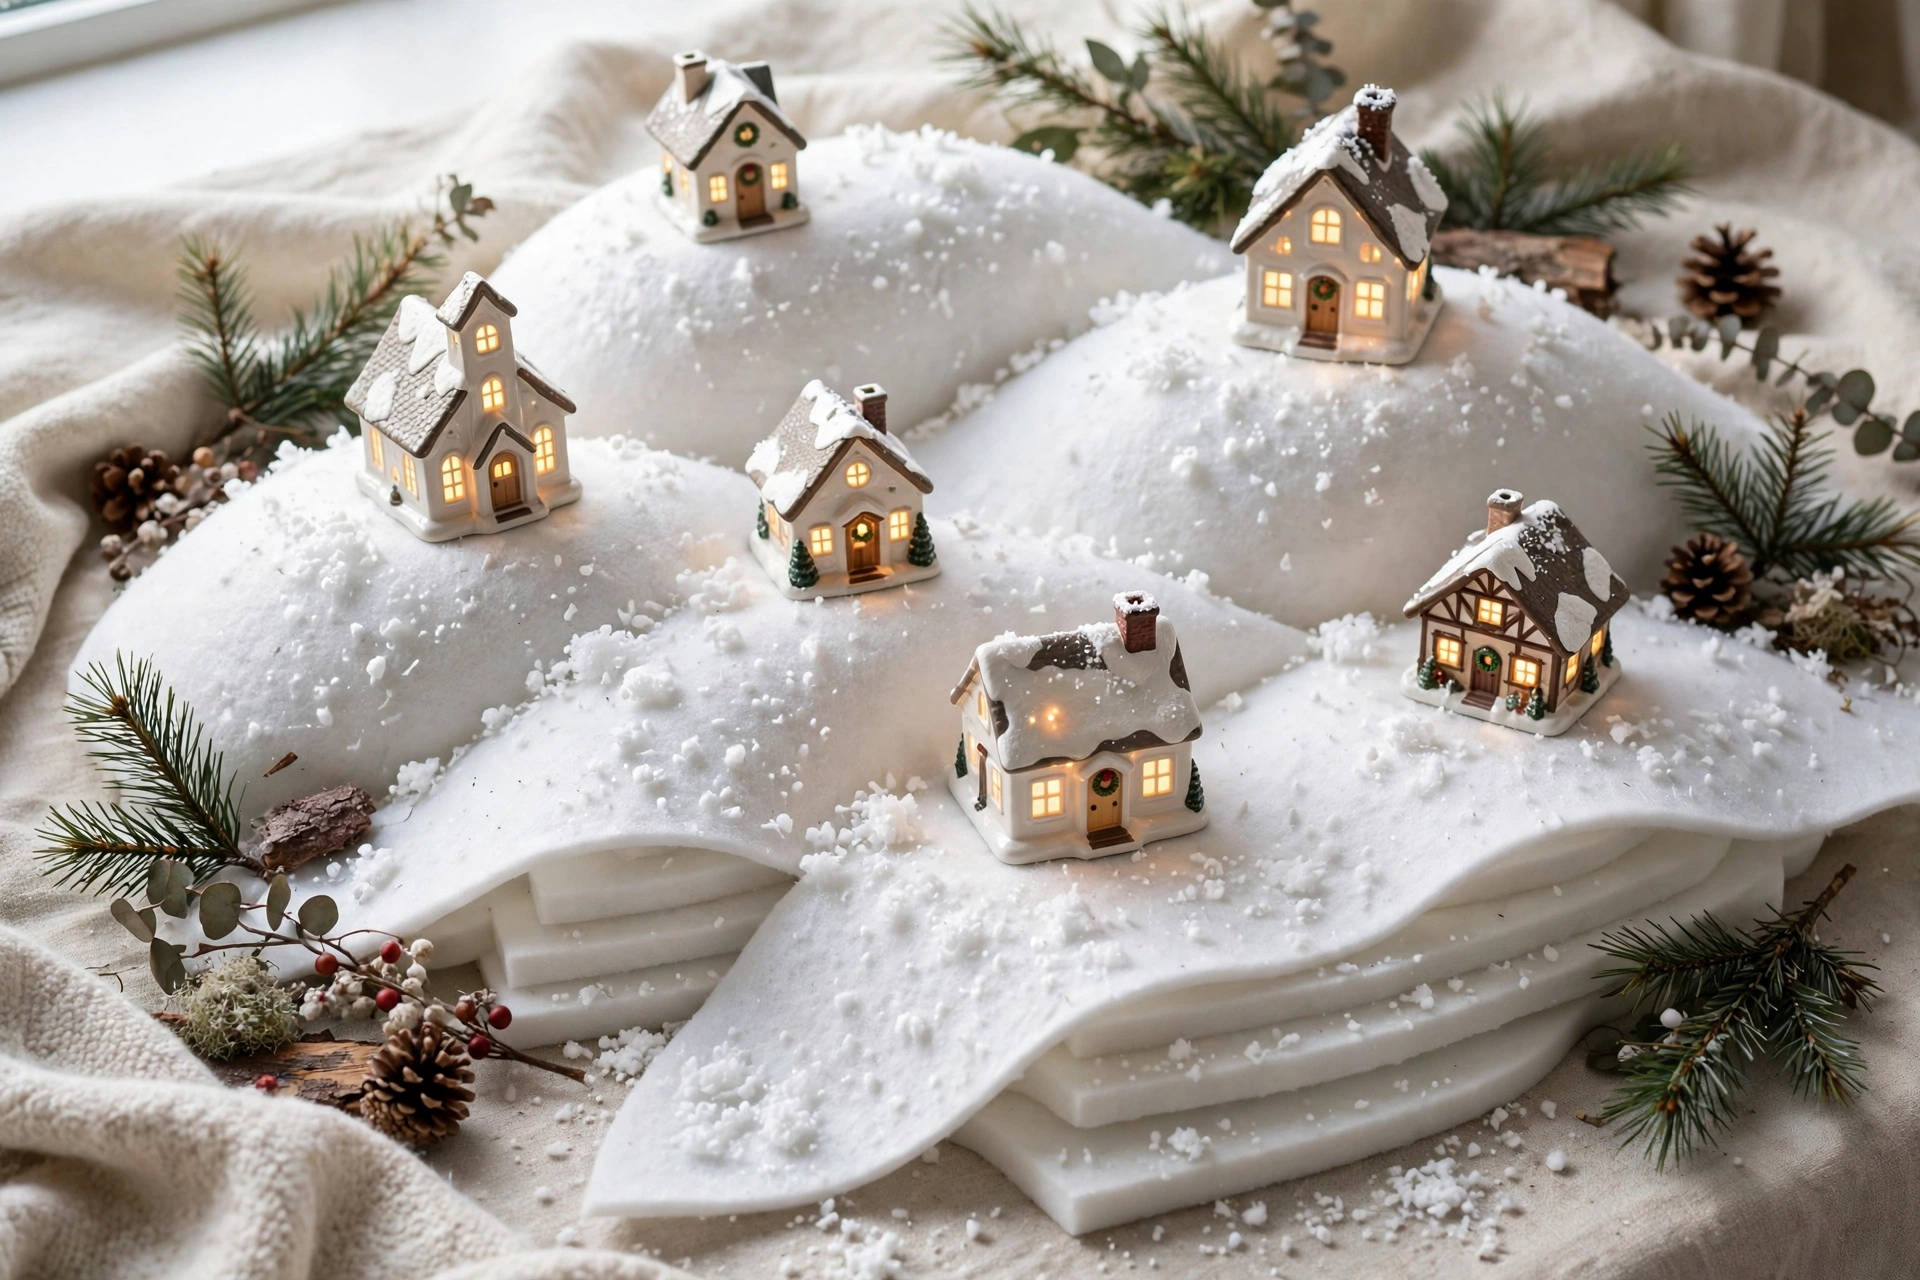
Flat villages look like shops on a shelf; hills make them look like a place. Cut white felt or quilt batting into soft mounds over foam blocks, stacked books or crumpled packing paper, and set houses at different heights on the slopes. Sprinkle a little fake snow or coarse glitter salt along the edges where drifts would gather, and press paths into the felt between the doors. The hills do three jobs at once: they create the tiers, they hide risers and cords, and they give the whole scene its winter softness. Make the highest hill at the back corner rather than the center, so the village feels discovered rather than staged, and keep one low flat area at the front for figures, a sled or a tiny market stall.
Budget: about $4–$7 total — felt or batting, foam offcuts and a bag of fake snow.
4. Use a Console Table With Crates and Risers

On a flat console or sideboard, height has to come from you — and wooden crates, sturdy boxes and thick books are the cheapest risers in the house. Build a simple skyline: one crate at the back left, a lower box at the back right, houses stepping down toward the front edge. Cover every riser completely with felt, a white table runner or a folded throw, so the eye reads snowy ground instead of furniture. Test the skyline empty before you place a single house: from across the room you should see three clear levels. This layered base is what separates a display from a row of houses on a table, and once it is built, rearranging the village each year takes minutes.
Budget: about $5–$10 total — crates or boxes from home plus felt to cover them.
5. Light Every House With Warm LED Tea Lights
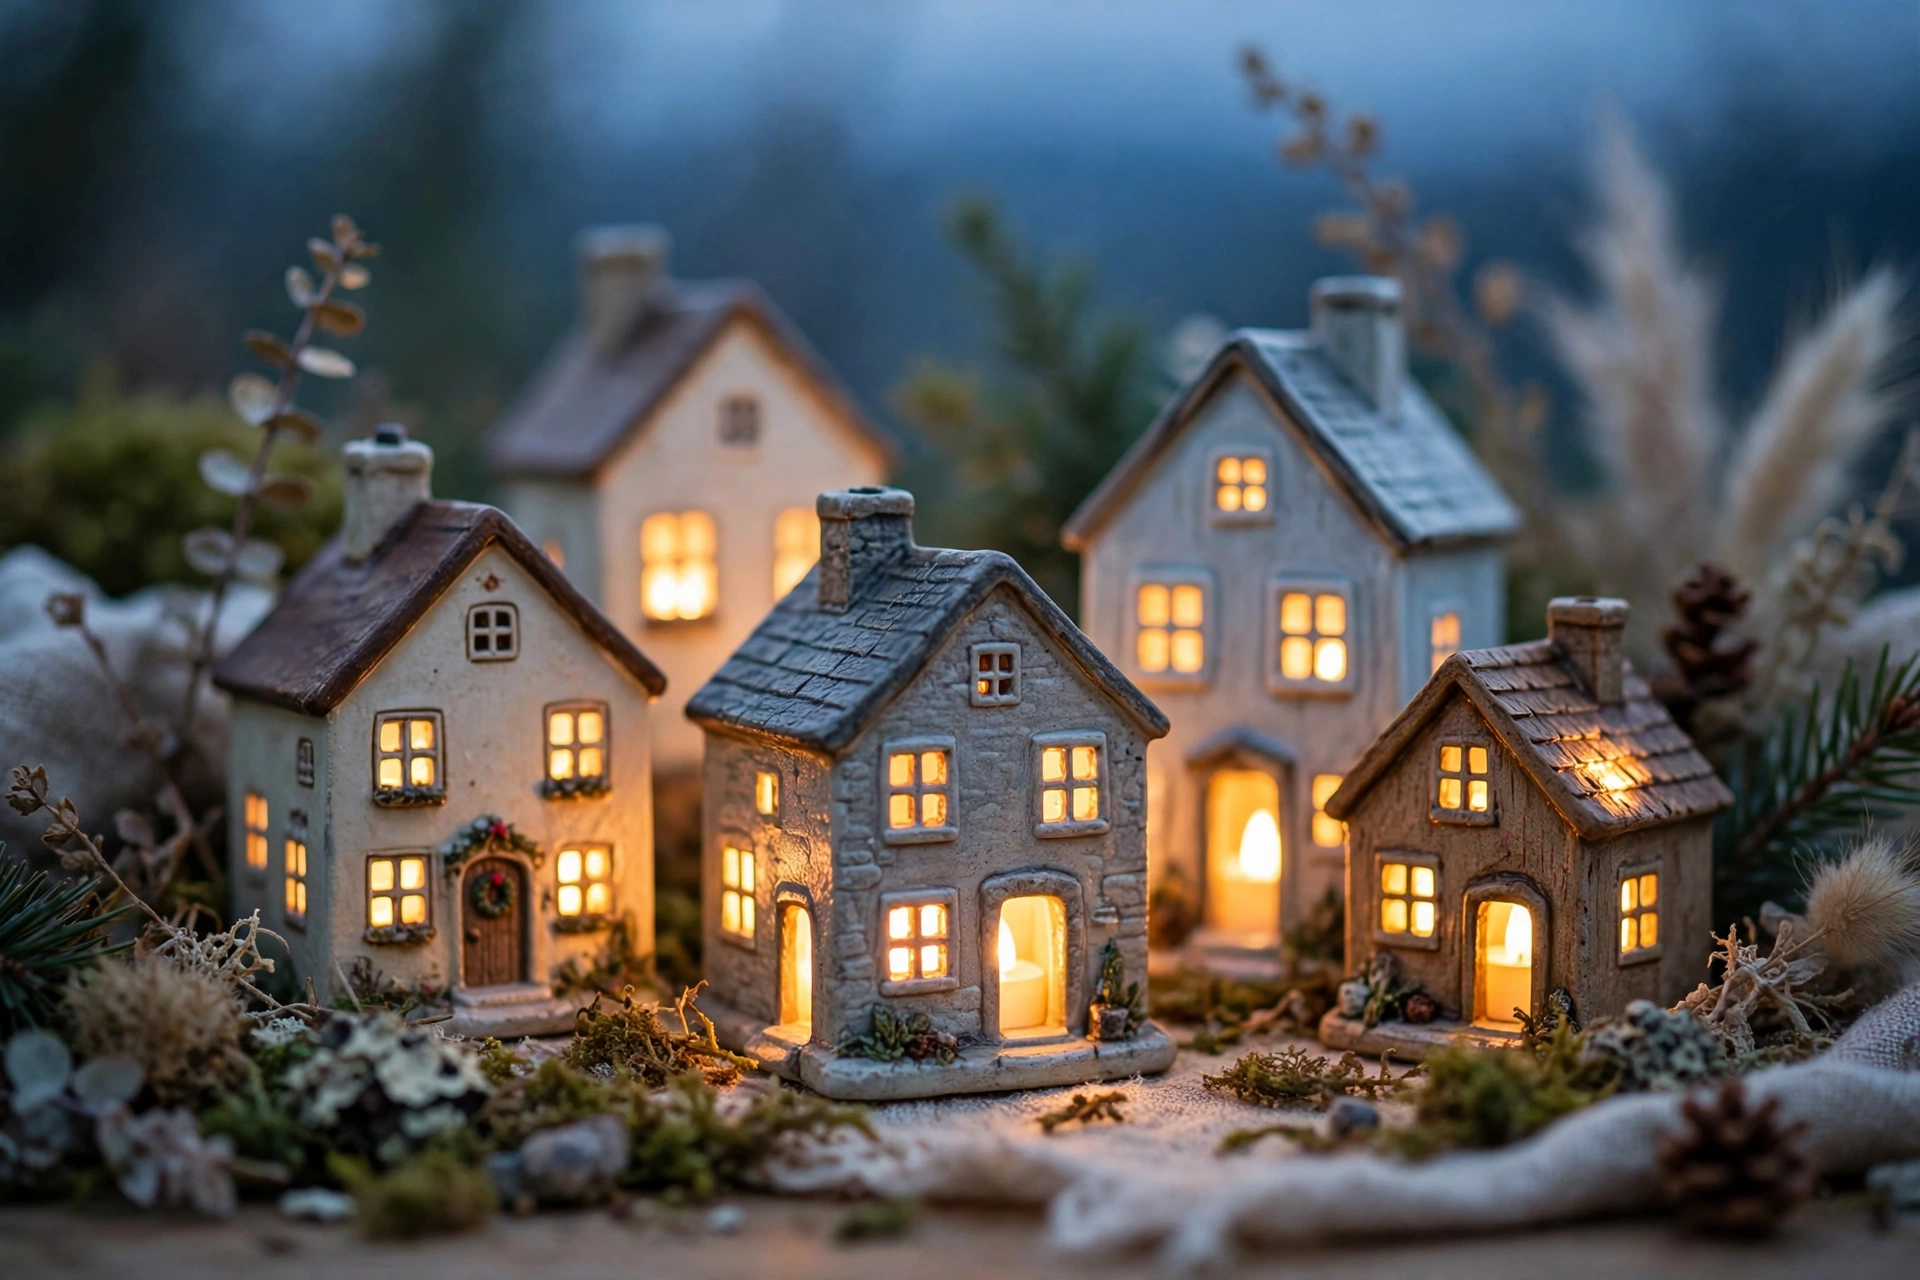
Light is the soul of a village, and warm LED tea lights are the budget way to get it. Slip one battery tea light inside each hollow house, or run one string of warm micro-lights behind the row with a bulb tucked at each window cluster. Warm white only — cool blue light makes a cozy village look like an aquarium. Battery lights win over cords in almost every spot: no outlet hunt, no cord across the floor, and most tea lights now come with a timer that turns the village on at dusk and off at bedtime by itself. Replace the batteries once in mid-December and the display will glow the whole season. At night, switch off the room’s main lamp for a minute and just look — that glow is the entire point of the village.
Budget: about $6–$10 total — a pack of LED tea lights or one micro-light string.
6. Run a Train or Sleigh Path Through the Middle

A path gives a village its story. Curve a small battery train track through the middle of the display, or, with no train, lay a simple path instead: a strip of tan felt as a road, a line of tiny stones, or a sleigh and reindeer crossing the front. A route explains why the houses face the way they do, leads the eye through the whole scene, and gives kids one moving or touchable element that is not a fragile house. Keep the track or road in the front half of the display so little hands can reach the train without reaching over the buildings. If a train is on your wish list, buy it after Christmas on clearance — village accessories are some of the deepest discounts of January.
Budget: about $8–$15 for a small battery train set — or $2–$3 for a felt road and a thrifted sleigh.
7. Paint Thrifted Houses Into One Color Family

Thrifted village houses are cheap because they rarely match — and paint fixes that in one afternoon. Spray or brush a mixed set in one family: all white with warm roofs, soft cream and sage, or classic red-brick tones touched up with a fine brush. Painting only the roofs one shared color is the faster version and keeps each house’s character while tying the set together. Work outside or in a ventilated spot, use two light coats instead of one thick one, and leave the windows unpainted so the light still shines through. A unified set of five-dollar houses looks, from three feet away, like a boutique collection that cost ten times more — this single trick is the best money-saver on this whole list.
Budget: about $5–$8 total — one can of spray paint plus houses at $1–$2 each.
8. Use a Mirror as a Frozen Pond

Every village wants one moment of scenery, and a small round or oval mirror makes a perfect frozen pond. Set the mirror flat in a low area of the display, ring it with fake snow so the edge disappears, and place two or three tiny figures or a small sleigh on the glass. The mirror reflects the house lights and doubles the glow, and at night it reads instantly as ice. A thrifted mirror, a silver tray or even a sheet of smooth foil on card will do the same job. Keep the pond off-center and partly under a bridge, a tree cluster or the front steps of a house, so it feels found in the landscape rather than placed on top of it. One scenery moment is enough — a pond and a path together can start to crowd a small display.
Budget: about $3–$6 total — a thrifted mirror or silver tray plus fake snow.
9. Fill Every Gap With Bottle Brush Trees

Bottle brush trees are the mortar of a village: cheap, everywhere, and exactly right for filling the gaps that make a display look sparse. Buy them in mixed packs and mix them properly — tall trees behind houses, small ones at front corners, one beside every door. Green is classic, white reads snowy, and a few metallic ones catch the light near the pond or the church. A tree should stand wherever two houses meet, wherever a riser edge shows, and wherever a cord peeks out. Add one tiny wreath on the church door and one on the best house, and stop there — small red details work because they are rare. A bag of trees is the purchase that makes even a three-house starter village look finished.
Budget: about $5–$8 total — one mixed bag of bottle brush trees plus two mini wreaths.
10. Build a Tiny Village Inside a Lantern
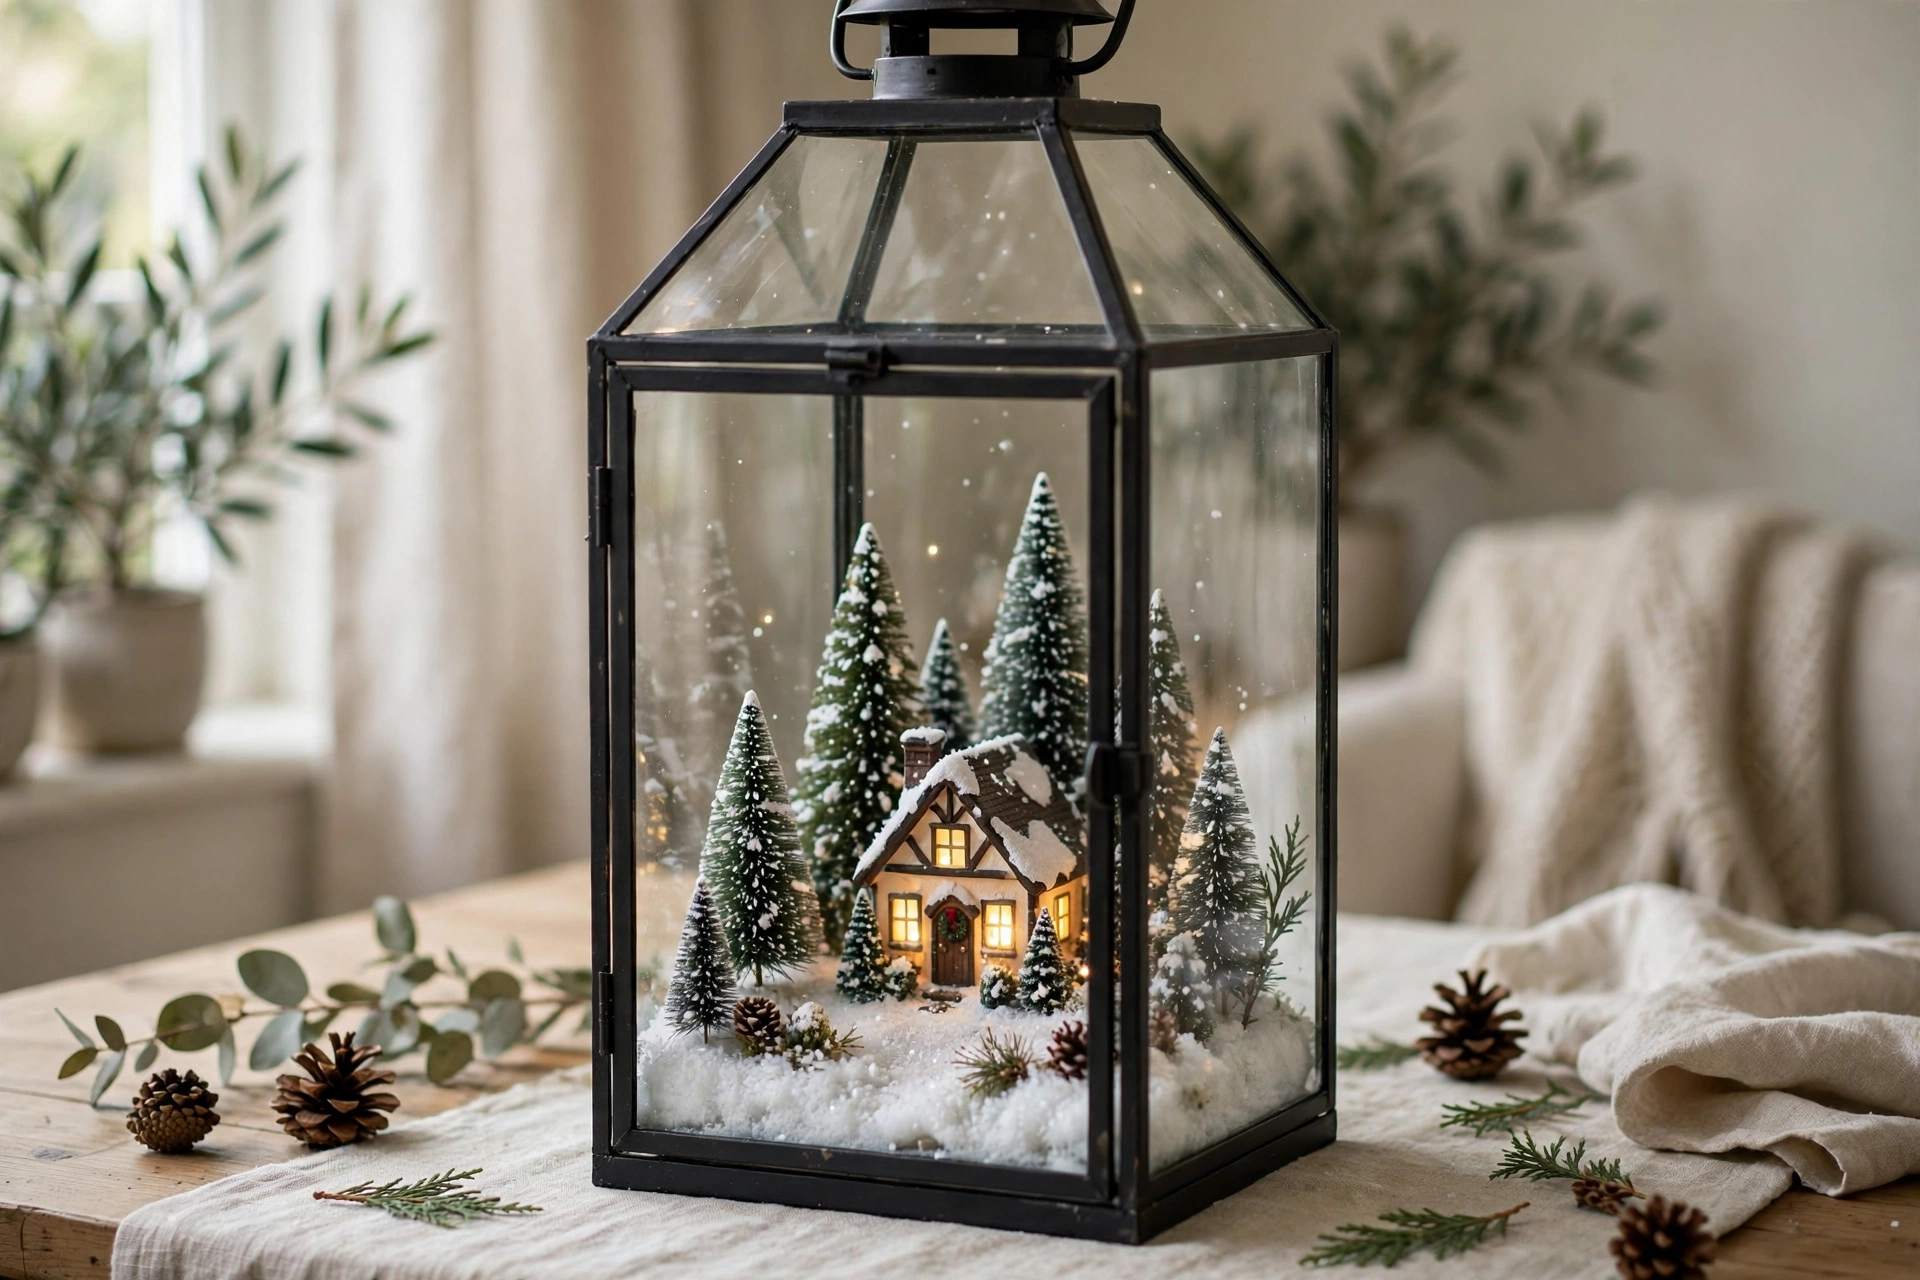
No surface to spare? A large lantern or glass cloche holds a whole miniature world in a footprint the size of a dinner plate. Spoon fake snow into the base, set one lit house in the middle, add two bottle brush trees and one tiny figure, and close the glass. The glass keeps dust and small fingers off, reflects the light back into the scene, and turns the piece into a table centerpiece or a night-light for a hallway. Lantern villages also travel well — build one as a gift and it arrives intact. Battery light only, never a real candle inside a decorated lantern, and leave a finger’s width of air around the house so the scene does not look stuffed.
Budget: about $7–$12 total — a thrifted lantern plus snow and one small house.
11. Set a Village on the Windowsill That Glows at Night
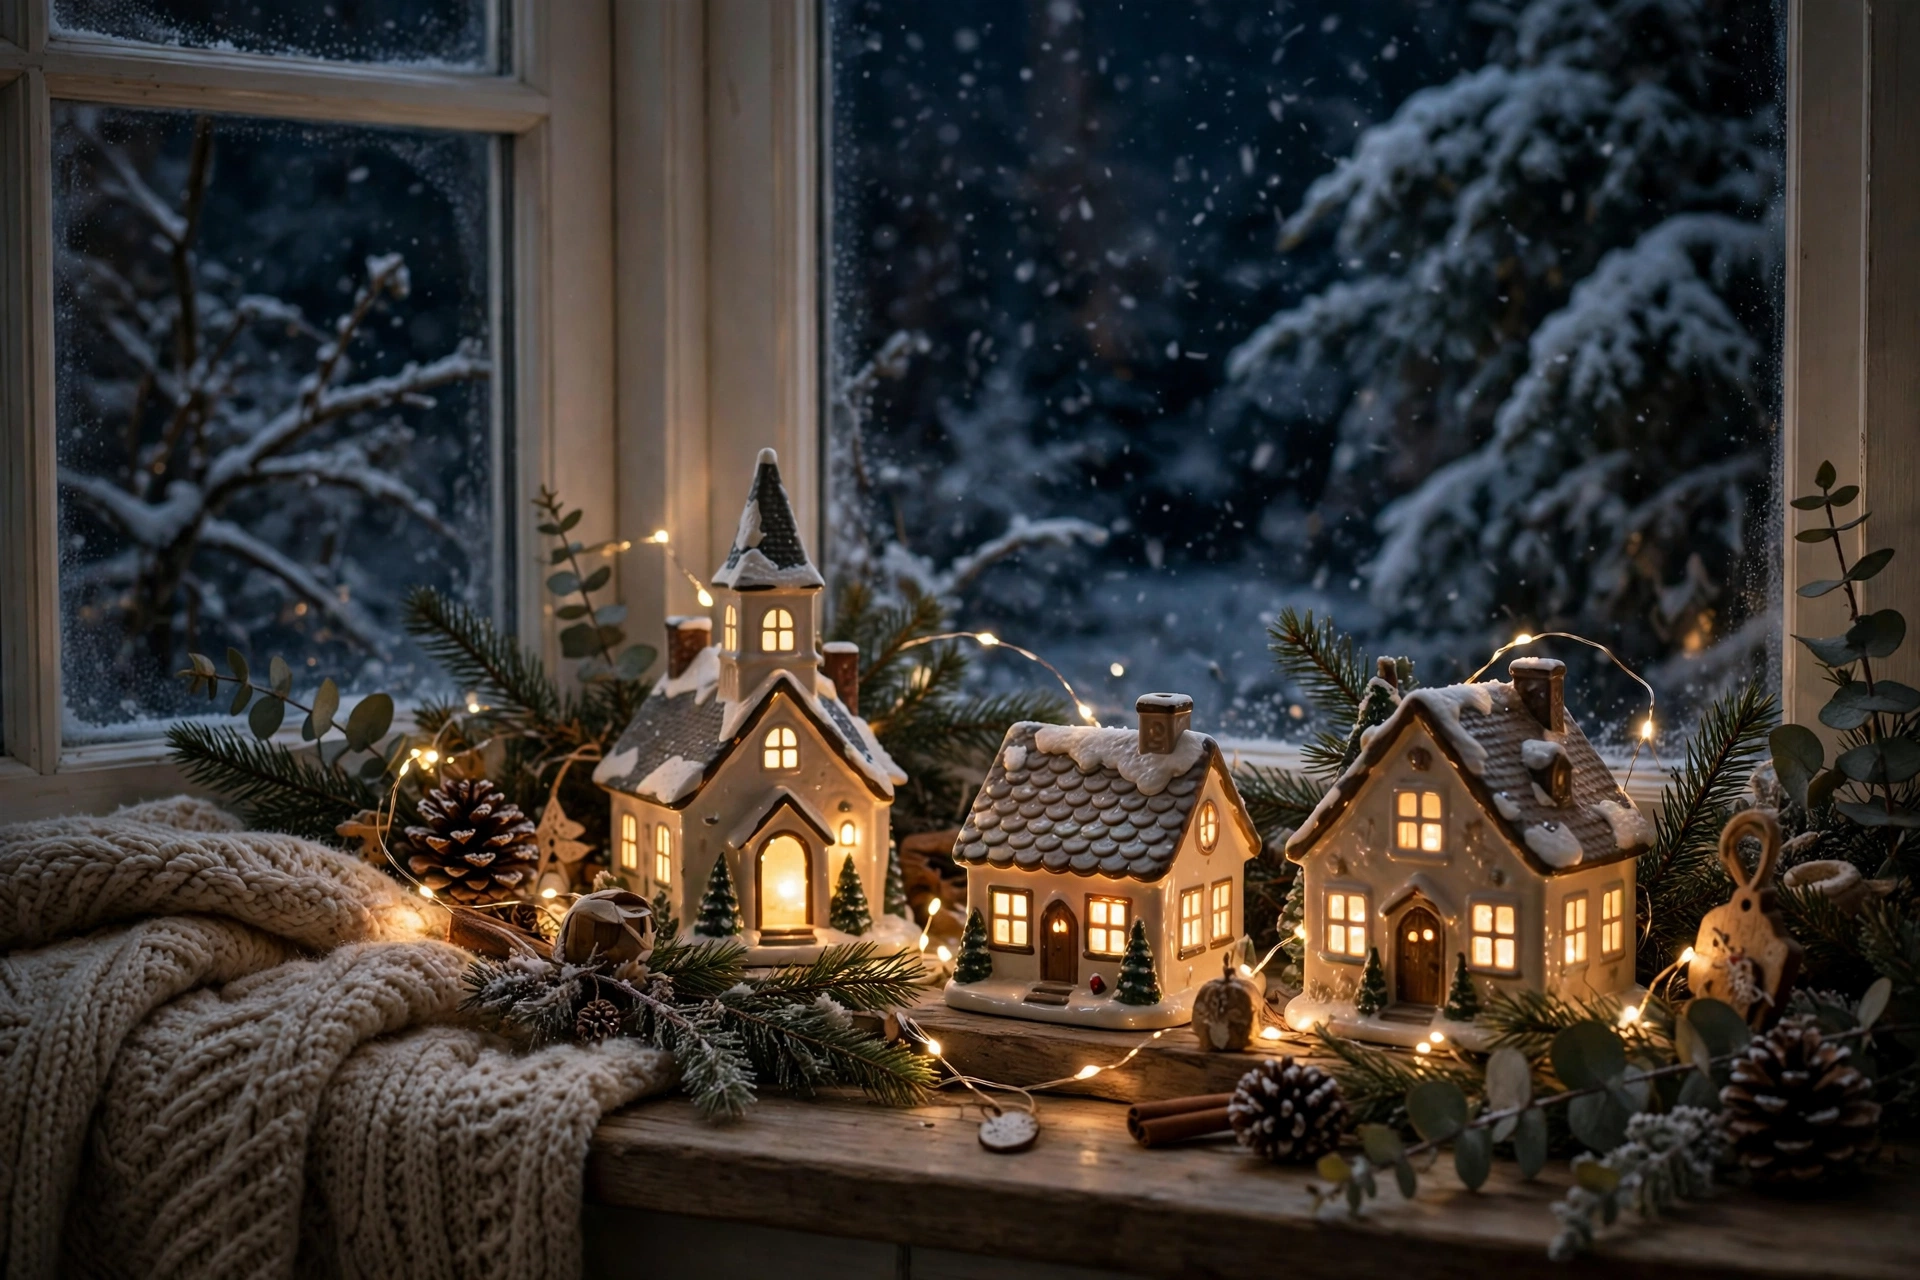
A wide windowsill gives you a village with a real winter backdrop. Arrange a single row of houses along the sill, tallest at one end, with fake snow pressed between them and a micro-light string behind. From inside, the houses glow against the dark glass; from outside, your window becomes the street’s little lit scene. Keep the arrangement one house deep — a sill is shallow — and secure each piece with museum putty if the window opens or vibrates. This is the best spot in homes where table space is fully booked by the tree and the dining table, and it pairs beautifully with paper snowflakes on the same window. Choose battery lights here above all: sills and cords are a clumsy mix.
Budget: about $4–$7 total — micro-lights and fake snow; houses from your collection.
12. Put It All Together — Christmas Village Display Ideas That Tell One Story
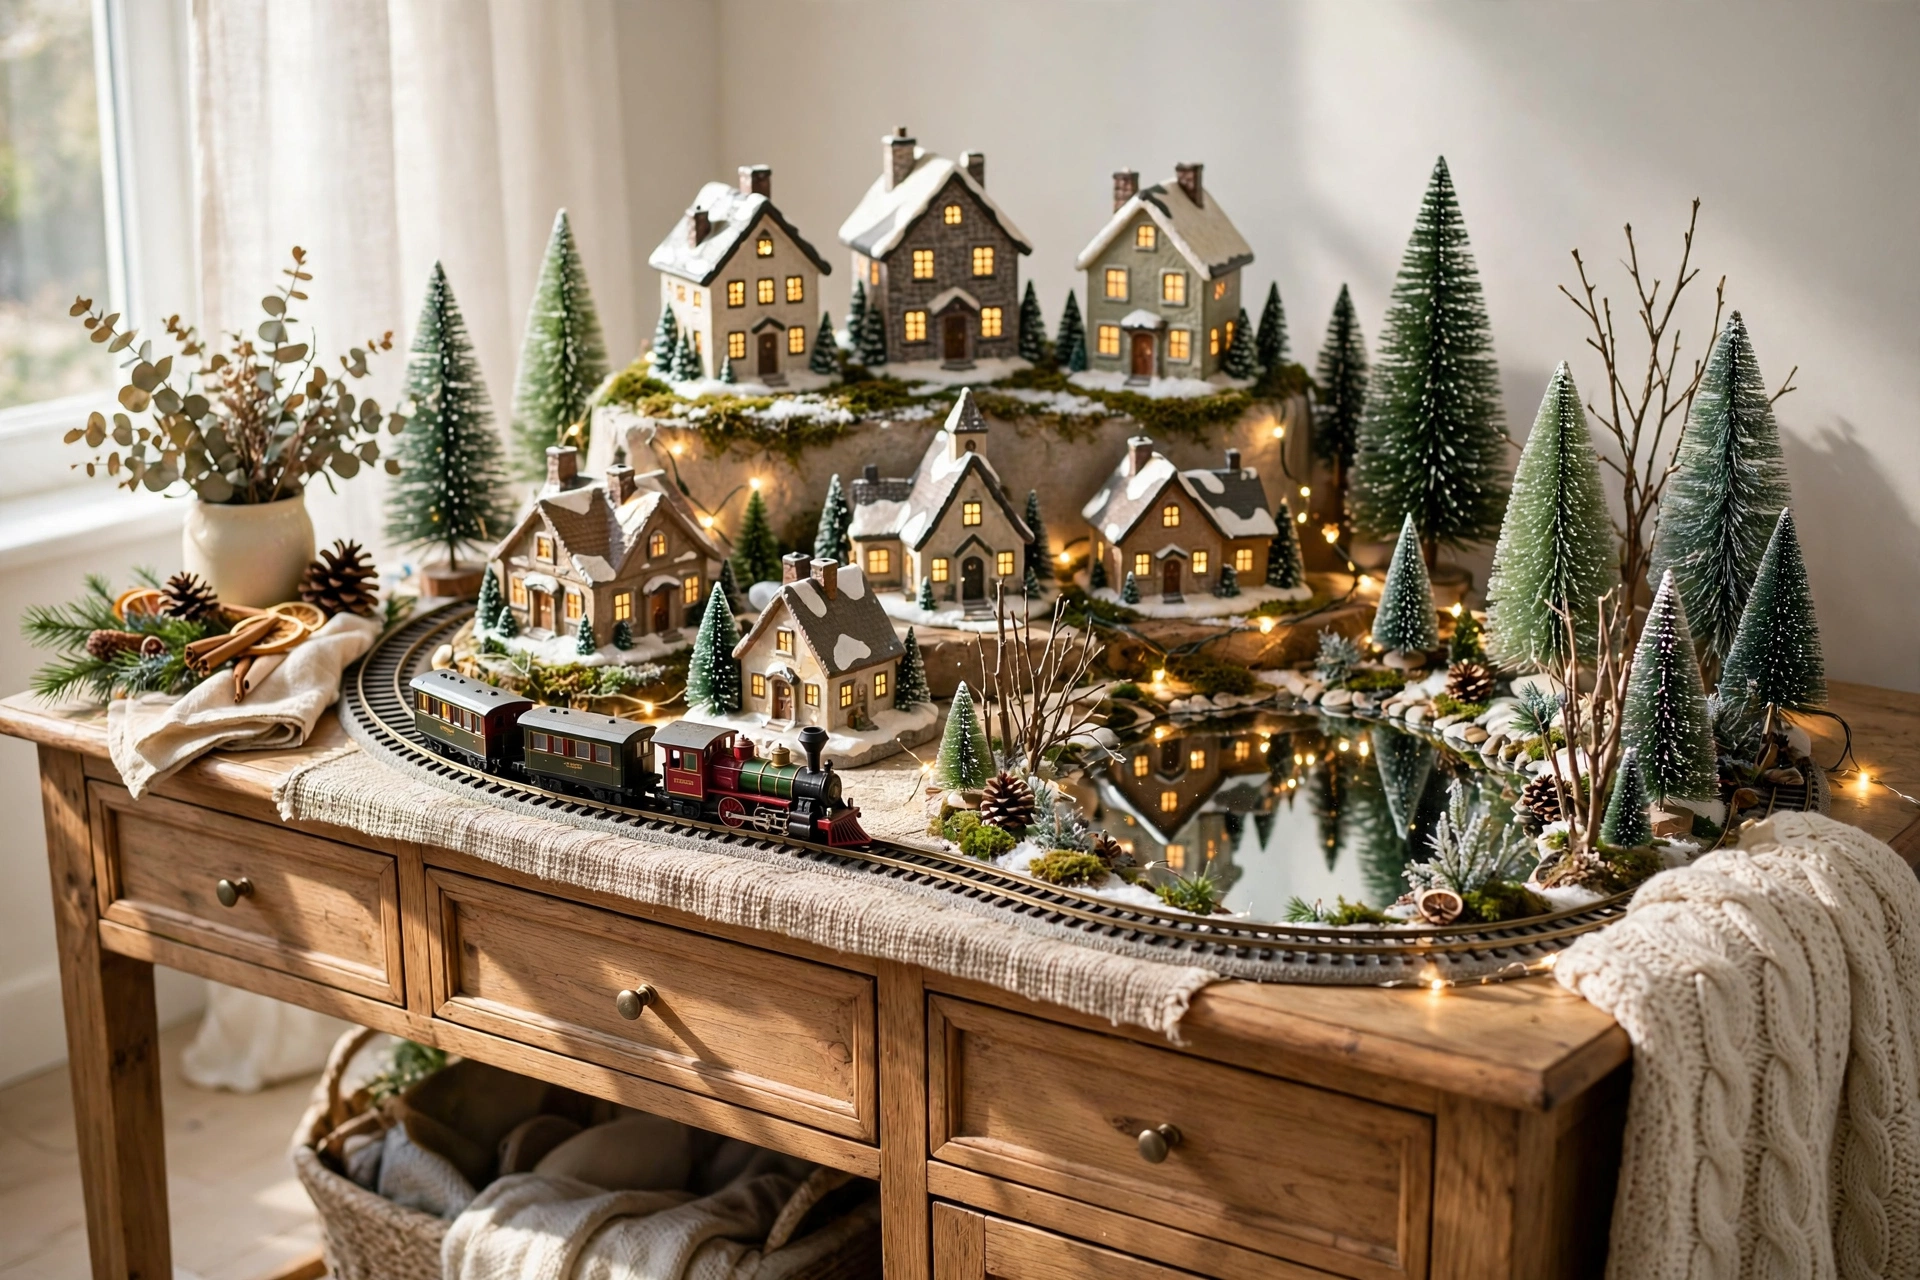
Now arrange the whole village as one place with one story. Give it a center — a church, a tree-lit square or the train station — and let the shops and houses step down around it. Check the three layers from across the room, confirm every house glows the same warm color, and add trees until no gap shows a riser or a cord. Then add exactly one personal detail: a tiny mailbox, a figure that looks like your dog, the year written small on a market stall. That one detail is what guests remember and what makes the village yours instead of a copy of a store display. Photograph it tonight, in the dark, and keep the photo with the boxes — next December, setup takes half the time.
Budget: about $30–$50 to build a full village from scratch — far less if you gather houses second-hand through the year.
Start small, light it warm, and let height and snow do the styling — those habits carry every display on this list. The best christmas village display ideas are built slowly, a few houses a year, until the little street on your sideboard holds a decade of Decembers. Set up yours this weekend, switch it on at dusk, and enjoy the quietest show in the house.
Total Cost Recap
| Idea | What You Need | Estimated Cost |
|---|---|---|
| Start on a Bookshelf — a Tiered Village on Shelves | White felt or batting plus houses you gather slowly | $3–$6 |
| Turn the Mantel Into Main Street | A thin garland and fairy lights; houses from your collection | $5–$9 |
| Build Snowy Hills From White Felt and Foam | Felt or batting, foam offcuts and a bag of fake snow | $4–$7 |
| Use a Console Table With Crates and Risers | Crates or boxes from home plus felt to cover them | $5–$10 |
| Light Every House With Warm LED Tea Lights | A pack of LED tea lights or one micro-light string | $6–$10 |
| Run a Train or Sleigh Path Through the Middle | A small battery train set, or a felt road and a thrifted sleigh | $2–$15 |
| Paint Thrifted Houses Into One Color Family | One can of spray paint plus houses at $1–$2 each | $5–$8 |
| Use a Mirror as a Frozen Pond | A thrifted mirror or silver tray plus fake snow | $3–$6 |
| Fill Every Gap With Bottle Brush Trees | One mixed bag of bottle brush trees plus two mini wreaths | $5–$8 |
| Build a Tiny Village Inside a Lantern | A thrifted lantern plus snow and one small house | $7–$12 |
| Set a Village on the Windowsill That Glows at Night | Micro-lights and fake snow; houses from your collection | $4–$7 |
| Total | $49–98 |
Frequently Asked Questions
Q: What does it cost to build a full village from scratch?
A: The article budgets about $30–$50 to build a full village from scratch — far less if you gather houses second-hand through the year.
Q: I don’t own any village houses yet. Where do I start?
A: Start on a bookshelf with white felt as snow (about $3–$6) and gather houses slowly. Thrifted houses run $1–$2 each, and one can of spray paint pulls them into one color family.
Q: How do I light the houses safely?
A: With warm LED tea lights — about $6–$10 for a pack or a micro-light string. No flames, no cords trailing across the display.